Free shipping to Austria and Germany on orders over €90

Mushroom Grain Spawn
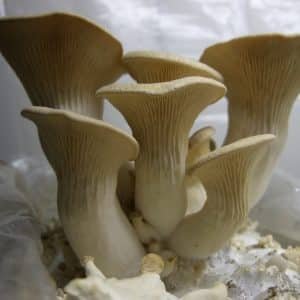
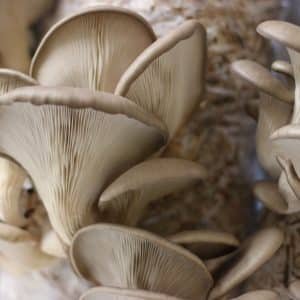
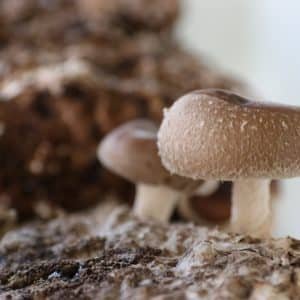
How to Use Mushroom Spawn – A Complete Step-by-Step Guide
Whether you’re working with grain spawn or plug spawn, the principle is the same: give your mycelium the right substrate, the right conditions, and a little patience – and it will reward you with a plentiful harvest. This guide walks you through every stage of the process, from substrate preparation to your first flush and beyond.
Step 1: Choosing & Preparing Your Substrate
Choose the Right Substrate for Your Mushroom Species
The substrate is the material your mycelium will colonise and feed on. Different mushroom species thrive on different substrates:
- Straw – ideal for oyster mushrooms and most Pleurotus varieties
- Hardwood sawdust or logs – perfect for shiitake, lion’s mane, and king oyster mushrooms
- Coffee grounds – a sustainable option for oyster mushrooms, often used in small-scale home growing
- Compost – suited to button mushrooms and similar species
Sterilise or Pasteurise Before Inoculation
Before adding your spawn, the substrate must be cleaned of competing microorganisms. The method depends on your setup:
- Pasteurisation (80–85°C for 1–2 hours) – suitable for straw and coffee grounds
- Sterilisation (121°C under pressure) – required for sawdust and nutrient-rich substrates
Allow the substrate to cool completely before inoculation to avoid killing your mycelium.
Step 2: Inoculating the Substrate
Using Grain Spawn
Grain spawn is mixed directly into the prepared substrate. Work quickly and cleanly to minimise contamination risk:
- Mix thoroughly – combine grain spawn and substrate at a ratio of roughly 10–20% spawn to substrate by weight. Even distribution is key to fast, uniform colonisation.
- Fill your containers – pack the inoculated substrate into sterile grow bags, buckets, or specialised mushroom cultivation containers. Leave some headspace for gas exchange.
- Seal – close bags with a filter patch or loose seal to allow CO₂ to escape while keeping contaminants out.
Using Plug Spawn
Plug spawn is designed for inoculating logs and wooden blocks – a slower but very low-maintenance method:
- Drill your holes – use a 8–9mm drill bit to create holes roughly 2–3 cm deep, spaced 10–15 cm apart in a diamond pattern across the log.
- Insert the plugs – tap each mycelium-colonised plug firmly into a hole using a hammer or rubber mallet until flush with the surface.
- Seal with wax – melt cheese wax or beeswax and brush it over each hole to lock in moisture and protect the mycelium from contamination and drying out.
Step 3: Incubation – Let the Mycelium Colonise
This is the waiting stage, but it’s also where the magic happens. Your mycelium is silently spreading through the substrate, building the network that will eventually produce your mushrooms.
- Temperature – most species colonise best at 20–25°C. Avoid cold drafts or direct heat sources.
- Light – keep in a dark or dimly lit space during incubation. Light is not needed at this stage.
- Humidity – the substrate should feel moist but never waterlogged. Mist the outside of bags lightly if needed.
- Duration – colonisation typically takes 2–6 weeks for grain spawn setups, and several months for logs inoculated with plug spawn.
The substrate is fully colonised when it is covered in dense, white mycelium with no patches of bare substrate visible. A healthy, earthy smell is a good sign. Any green, black, or pink patches indicate contamination – remove affected sections immediately.
Step 4: Triggering Fruiting
Once colonisation is complete, your mycelium needs a change in conditions to trigger fruiting – mimicking the shift from summer to autumn in nature.
- Humidity – increase to 85–95% by misting more frequently or using a humidity tent.
- Temperature – drop slightly to 15–20°C for most species. This temperature shift is often what triggers pinning.
- Light – move to a spot with indirect natural light or 12 hours of artificial light per day. Light signals to the mycelium that it has reached the surface.
- Fresh air – increase ventilation to reduce CO₂ levels. High CO₂ causes long, leggy stems and small caps. Fan the growing area 2–3 times daily or use a bag with filter patches.
Small pins (primordia) will begin to appear within a few days to two weeks under good fruiting conditions.
Step 5: Harvesting Your Mushrooms
Timing your harvest correctly makes a big difference to both yield and flavour.
- Harvest just before the caps fully open – this is when mushrooms are at peak flavour and before they begin to drop spores.
- Twist and pull – gently twist the mushroom at the base and pull in one smooth motion. This removes the entire fruiting body without damaging the mycelium beneath.
- Alternatively, use a clean knife – cut flush with the substrate surface to avoid leaving rotting stumps behind.
Step 6: Aftercare & Second Flushes
The harvest doesn’t have to end after the first flush. With good aftercare, most substrates will produce two to three flushes – sometimes more.
- Clean the surface – remove any remaining mushroom stumps or spent material after each harvest to prevent mould.
- Rest & rehydrate – allow the substrate to rest for 5–10 days, then soak or mist heavily to rehydrate before the next fruiting cycle.
- Repeat fruiting conditions – return to the same humidity, temperature, and airflow setup to trigger the next flush.
Yields typically decrease with each successive flush as the substrate nutrients are consumed. Once the block stops producing or shows signs of contamination, it can be composted or used as garden mulch.
Quick Reference: Ideal Growing Conditions by Species
- Oyster mushrooms – colonisation 22–24°C, fruiting 15–20°C, humidity 85–95%
- Shiitake – colonisation 22–25°C, fruiting 10–18°C, humidity 80–90%
- Lion’s Mane – colonisation 21–24°C, fruiting 18–22°C, humidity 85–95%
- King Oyster – colonisation 22–25°C, fruiting 10–16°C, humidity 85–95%
Ready to get started? Browse our grain spawn and plug spawn, or explore our ready-to-fruit mushroom growing kits for the easiest possible start.
Account details
Contact us
- office@stoffn.at
- Contact form
- Tel.: +43 664 750 936 04
Opening hours:
Mon – Thu: 8 AM – 5 PM, Fri: 8 AM – 1 PM
Farm Shop (Self-Service):
Daily from 7 AM – 7 PM
Edt 4, 5205 Schleedorf, Austria