What is Agar?
Agar is a transparent, odorless and tasteless gelatinous substance obtained from red algae.
It is used as a gelling agent, thickener and stabilizer in foods and to create nutrient-rich growth media for fungal spores and mycelium.
How does Agar work?
Agar is solid at room temperature. Like gelatine, it is used as a strengthening agent. The more agar you add to a mixture, the firmer the final growth medium becomes.
Prepare agar for mushrooms
To prepare agar for mushroom breeding, combine it with a nutrient-rich substance and water and then sterilize the resulting mixture in a pressure cooker or autoclave.
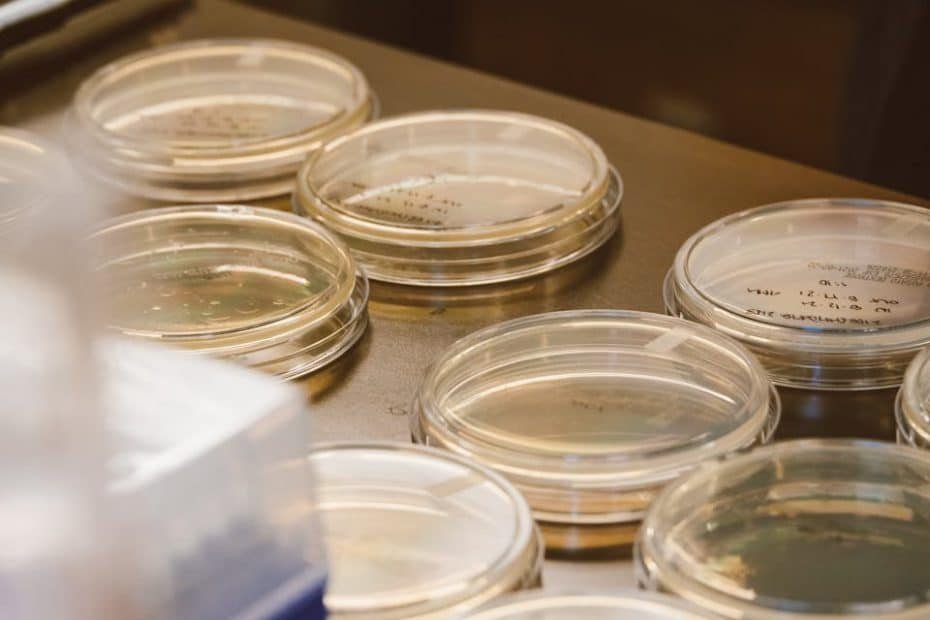
Why use agar plates?
Agar plates are Petri dishes that contain a sterile, nutrient-rich agar solution that provides nutrients for mycelial growth in the sterile environment within the Petri dishes.
The main advantages of agar plates:
- Cloning of mushrooms: Allows fungal cloning and germination of new strains of fungal spore prints with less risk of contamination
- Contamination Detection: Agar is colorless, making it easy to detect and remove mushroom contamination
- Mycelium Rescue: For contamination, you can cut out a piece of healthy mycelium and transfer it to another sterile plate
- Long-term storage: Allows storing fungal mycelium over long periods of time
💡 Tip for long-term storage: Once a Petri dish is fully colonized, you can store it in a sealed plastic bag in the fridge and the mycelium can remain viable for up to 12 months.
Making agar plates step by step
This article focuses on the production of light malt extract agar plates that support most types of edible mushrooms.
You need the same equipment for other recipes. The only difference is what you use as a nutrient source for the fungal mycelium.
Step 1: Collect Material
The first step is to collect all the materials and equipment you need to make agar panels:
Basic ingredients:
- agar agar – Not always locally available, possibly order online
- Light malt extract – Available in brewery stores or online
- Nutrient yeast (optional) – in organic shops and organic supermarkets
- Water – Distilled water is recommended, tap water also works
Equipment:
- Petri dishes – Order online from laboratory supplies companies
- wide neck glasses – Mason jars with perforated lids work well
- Polyfill filling material – Use as a filter in the lid holes
- aluminum foil – to cover the lids during sterilization
- digital scale – for accurate measurement of dry ingredients
- pressure cooker – for sterilization
- Clean workplace – Still Air Box or Laminar Flow Hood
Step 2: Mix Ingredients
Accurate measurements are critical in the manufacture of Agar plates, as false amounts can lead to slower mycelial growth and increase the risk of contamination.
⚠️ Important tip: Use your digital scale to measure 10g agar and 10g light malt extract, and a glass measuring cup for the hot water.
Many breeders use boiling water, but hot tap water also works. Remember: Agar added to cold water immediately begins to freeze, making mixing difficult.
Pour the dry ingredients into your measuring cup for hot water and stir vigorously until the agar and malt extract have dissolved.
Step 3: Sterilize
Your solution is ready for sterilization once the dry ingredients are completely dissolved.
Pour the solution into your jars or bottles and fill about two-thirds to prevent them from boiling over during sterilization.
Sterilization Protocol:
- Close jars with modified polyfill-filled lids
- Cover the lid with aluminum foil
- Place jars upright on a rack in the pressure cooker
- Sterilize 30 minutes at 15 PSI
- Let cool to 46-52°C (2-3 hours)
⚠️ Attention: The timing only begins when the pressure cooker has reached 15 psi. Casting the plates when the mixture is too hot can deform or damage plastic Petri dishes.
Step 4: Pour Agar
One of the most important factors for success in this phase is working in a clean, sterile environment to avoid contamination.
🔬 Sterile working environment: Ideally, you should work in front of a laminar flow hood, but a still-air box also helps reduce contamination.
casting technique:
- Open the first Petri dish
- Pour in some agar mixture (enough to cover the soil)
- Close quickly and switch to the next bowl
- Pour all Petri dishes in one session
- Do not touch the interior of the shell with your hands
- Leave the lid of each Petri dish open as short as possible
Leave the Petri dishes stacked in front of your running laminar flow hood or in the still air box until they cool down to room temperature.
Step 5: Seal Agar Panels
You have to wait about 30 minutes to 1 hour for the agar plates to cool and solidify.
💧 Condensation: During cooling, some plates can get condensation on the inside of the lids. This initial condensation usually disappears and is usually not a problem.
If you don’t want to use all agar plates immediately, you’ll need to seal them for storage.
Sealing with Parafilm:
- Cut off a piece of laboratory parameter about 7-10 cm in length
- Peel off the paper
- Fold the 5 cm parafilm lengthwise in the middle
- Wrap the parafilm around the edge of the Petri dish
- Stretch it until it sticks to the shell
🔧 Why Parafilm? Most breeders agree that laboratory parafilm is the best material for sealing agar panels because it is breathable, flexible and prevents contamination.
Step 6: Store Agar Plates
Optimal storage conditions:
- temperature: 2-4°C in the fridge
- Storage: in a sealed container or plastic bag
- Durability: 2-4 weeks for best results
Before use:
- Check plates carefully for contamination signs
- Allow to warm to room temperature before opening
- This helps prevent condensation that can cause contamination
Abstract
Agar plates allow you to clone mushrooms, germinate new spore-printed strains, and store mushroom mycelium with less risk of contamination.
If you like experimenting and want to experience the entire mushroom growing process, Agar plates will make your life easier.
But if you’re more interested in growing mushrooms profitably or starting a small mushroom farm, we recommend skipping the agar part and buying cereal substrate to inoculate your mushroom substrate.
More Resources
To learn more about the low-tech cultivation of mushrooms, visit specialized mushroom cultivation hubs or try mushroom farming courses.