By Sebastian Reindl · Stoff’n e.U., Schleedorf · about 10 min read
Some mushrooms are forgiving. Oyster mushrooms tolerate mistakes, and shiitake will usually pull through in less than ideal conditions. Then there’s maitake, Grifola frondosa, which makes one thing clear from the start: it sets the pace.
I started my first maitake batch some years ago with too much optimism and too little patience. The block took three months to do anything. Today I know that was normal. Growing maitake means working on a timescale of weeks and months, not days.
If you can accept that, it’s one of the most satisfying mushrooms you’ll ever harvest. This guide covers what you need, how to go about it and where things most often go wrong.
What is maitake?
In the wild, Grifola frondosa grows as a many-capped polypore at the base of old oaks, beeches and maples, mainly in North America, Japan and parts of Europe. In English it’s also called hen of the woods. In Japanese, “maitake” means roughly “dancing mushroom”, and the story goes that foragers danced for joy when they found one. Wild specimens can weigh several kilograms.
As an edible mushroom, maitake has an earthy, nutty flavour and a firm texture that doesn’t fall apart straight away in cooking. It has had a place in Japanese and Chinese cooking for centuries. We don’t make any health claims about it here.
In cultivation, maitake needs the right substrate, a patient incubation and a fruiting stage that can’t be rushed. If you’ve only grown oyster mushrooms so far, this is a different league.

The best conditions for growing maitake
Before the steps themselves, here are the main settings. Maitake is much more demanding here than most cultivated mushrooms. Growers’ figures differ, so treat these as a starting point.
Substrate
Maitake loves hardwood. Oak is ideal, and beech and maple also work. One proven mix is 65% hardwood sawdust + 35% soy hulls. Another is 80% sawdust + 20% bran. A common moisture target is about 57.5%, slightly drier than the usual 60%, although some growers work a little wetter.
Temperature
Incubation and pinning: 20–23 °C. Active fruiting after opening the bag: 16–18 °C. That means you’ll need either a cellar or climate control.
Humidity and CO₂
Maitake tolerates high CO₂ in the sealed bag. After opening, CO₂ should fall below about 1,000 ppm, because too much causes small, misshapen caps. Aim for 85–95% humidity, but avoid water droplets directly on the mushrooms.
Light
No light is needed during incubation. After opening, give it about 500–1,000 lux for 12 hours a day, which is more than most cultivated mushrooms need.
Step 1: Gather your materials
You’ll need maitake grain spawn (fresh!), hardwood sawdust, soy hulls or bran, grow bags with filter patches, a pressure cooker, 70% isopropyl alcohol, disposable gloves, and a still air box or laminar flow hood.
Important: Buy your grain spawn fresh. Old spawn is one of the most common reasons maitake fails. Our shop doesn’t currently list maitake spawn, but you’ll find grain spawn for other species there.
Step 2: Prepare and sterilise the substrate
Mix the sawdust and supplement, then work in water until you reach your moisture target. To test it, squeeze a handful firmly: one or two drops should come out. Sterilise in a pressure cooker at 15 PSI for at least 2 hours.
What I’ve learned: Pasteurising alone isn’t enough for maitake. It isn’t an aggressive coloniser, and without full sterilisation you’ll lose the batch to competing fungi.
Step 3: Inoculate
Let the substrate cool to room temperature, then inoculate in the cleanest conditions you can manage. The recommended rate is 5–6% of the wet substrate weight. Going above 10% brings no benefit.
Tip: Use a still air box or laminar flow hood. Maitake is less forgiving of contamination during inoculation than oyster mushrooms.
Step 4: Incubation, the long part
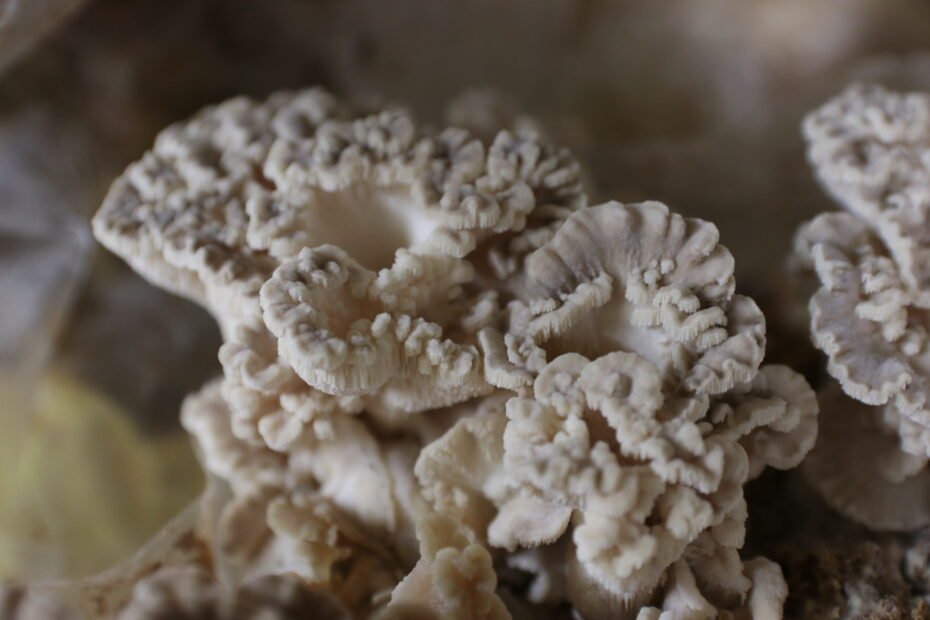
Keep the bags in the dark at 20–23 °C. After about 3 weeks, the substrate will be covered in white mycelium, but it isn’t ready yet. When the surface turns grey-brown and forms small bumps, that’s a good sign. Leave it alone for another 3–5 weeks. Total incubation is 6–10 weeks, sometimes longer.
What I’ve learned: This is where most people give up, because they think something has gone wrong. It hasn’t. Maitake simply needs time.
Step 5: Fruiting, and getting the timing right
Opening the bag is the most critical moment. Open it when the grey bumps start to form finger-like stems or fan-shaped beginnings. Leave about 5 cm of bag at the top as a windbreak, and cut a slit in the side so the mushrooms can push out.
If you can, fruit maitake without other mushroom species in the same room. From here, it takes 1–2 weeks until harvest.
What I’ve learned: Open too early and the pins abort. Open too late and the mushrooms develop badly inside the bag. Timing is a skill, and it comes with experience.
Tip: Photograph and date the pinning signs. That way, you’ll judge the window better with each new block.
Step 6: Harvest
Harvest while the caps are still slightly curled, before the edges turn pale and start to release spores. Hold the whole cluster at the base, twist gently and pull. This protects the mycelium for a possible second harvest 3–4 weeks later.

Maitake on logs: the outdoor option
If you have access to fresh oak logs, you can also grow maitake outdoors. A well-colonised log can fruit for years, with up to seven often quoted in good conditions. The key difference from other log mushrooms such as shiitake is that maitake logs must be heat-treated before inoculation.
The process in brief
Logs: Use fresh oak, about 20 cm in diameter and 20–25 cm long. In a grow bag, pressure-cook at 15 PSI for at least 2 hours, or steam for 3–6 hours.
Inoculate: After cooling, spread sawdust spawn generously around the log and close the bag.
Incubate indoors: Allow 2–3 months at 12–21 °C somewhere free of draughts.
Bury: Bury the colonised log upright in a shady, moist bed, with about 2.5 cm of soil over the top. Mark the spot clearly.
First harvest: Expect it a year after burying at the earliest, usually in late summer to autumn. It can take longer.
From the farm: what I’ve learned (and what went wrong)
I grow under certified organic conditions in Schleedorf, and maitake is always a controlled niche project for us. It can be scaled, but it doesn’t forgive mistakes.
The most common mistake: Opening bags too early. If you’ve never grown maitake, you see white substrate after 6 weeks and think it’s time. It isn’t. I used to put myself under pressure because I needed the space in the fruiting room. The result was aborted pins and waste. Today I let maitake keep its own schedule.
What really makes a difference: Spawn quality. With oyster mushrooms, you can get by with average spawn. With maitake, any weakness shows up immediately, and the longer the incubation, the higher the risk of contamination.
A tip for the fruiting area: Maitake is sensitive to draughts. I once placed a fan too close to a block. The mushrooms still grew, but they were much smaller and drier than usual. Since then, I’ve used indirect airflow with baffles.
For hobby growers: Start with a single block and watch it closely. Growing maitake is good training for the eye.
For aspiring professionals: Plan for the long time your space is tied up. I don’t recommend starting with maitake as your main product. Add it alongside faster species such as oyster mushrooms. We also run workshops in Schleedorf.
Maitake growing FAQ
Can I grow maitake as a beginner?
Maitake isn’t a beginner’s mushroom. If you have no experience yet, start with oyster mushrooms or a grow kit. Maitake demands clean work, patience and a good feel for how mycelium develops.
How long until the first harvest?
Indoors in a bag, allow 6–10 weeks of incubation, then 1–2 weeks of fruiting. From inoculation to harvest, it often takes 3–4 months in total. Outdoors on logs, the first harvest comes a year after burying at the earliest.
What is the best substrate for maitake?
65% hardwood sawdust (ideally oak) + 35% soy hulls. Alternatively, 80% sawdust + 20% wheat bran. A common moisture target is about 57.5%, slightly drier than for many other mushrooms.
Why do my maitake pins abort?
The most common causes are opening the bag too early, too much draught, humidity that’s too low after opening, or CO₂ that’s too high (above about 1,000 ppm after opening). Often it’s a combination.
Can I fruit maitake in the same room as other mushrooms?
I don’t recommend it. Many growers report worse results in mixed fruiting rooms, although it isn’t fully clear why.
How many harvests can I get from one block?
Usually 1–2 from a bag. Outdoors on logs, good conditions can give several harvests over many years.
Ready to start growing?
At Stoff’n you’ll find fresh organic grain spawn for other species, grow kits and practical workshops, all from our certified organic farm in Schleedorf.